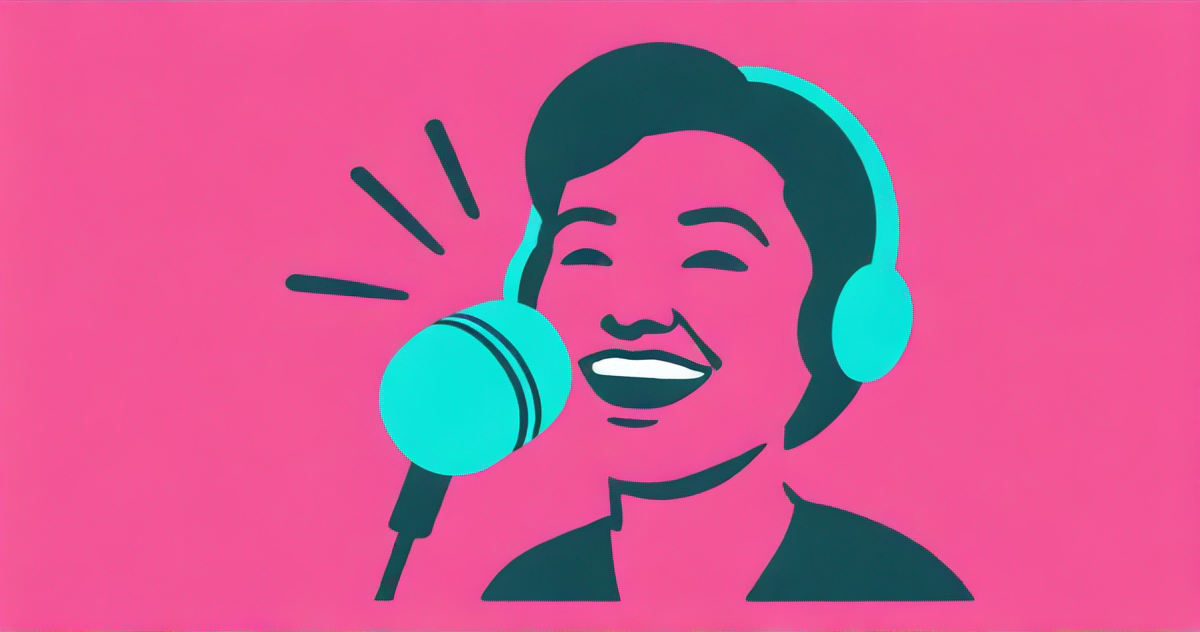
How to do the Narrator TikTok Trend
Connect with your audience by adding your own authentic voice over to a Narrator Trend video
Want to make your TikTok and Instagram videos feel more professional by adding a narrator? It’s no secret that this can be done with AI text-to-speech tools, but a new trend shows there’s a better way.
The Narrator Trend is a growing format on TikTok where creators not only add an AI narrator voice to their video, but also interact with that narrator by responding, interrupting, and even correcting it. This makes the video more engaging and adds a layer of professionalism by introducing multiple voices.
In this article, we’ll walk through how to do the Narrator Trend by building a video from scratch. Along the way, you’ll learn how to write a script, add a narrator voice, and edit your video with features like automatic captions.
Table of Contents
Create a Video Script
The first step in creating your trending video is to start with a script. For the best success, take time to think about a central video subject that your script will focus on and that you have clips to support. Some examples of this include:
- A retrospective life update
- A recap of a recent trip
- Your thoughts on an important upcoming event
- A day in your life
- Planning for a party
@ambardriscoll Okay had to jump on this narrator trend!! Maybe I will actually make this a series trying something new every week
♬ original sound - Ambar Lee
Whatever topic you choose to structure your video around, having a personal connection to the topic is key. Since this video trend combines a passive narrator with active interjections, it’s important to include substantial dialogue that adds insight or humor to keep the viewer engaged.
Using Kapwing, you can streamline the scripting process by using an AI Script Generator to assist with writing.
To use this tool, start by configuring it to match your desired video. Here are the main areas to pay attention to:

- Script Input: This textbox is where you will enter your script generation prompt.
- Tone: Adjust the tone of your video script by selecting from the available options, including Formal, Casual, Funny, Informative, and Creative.
- Video Length: Select how long your video will be, ranging from 15 seconds to 5 minutes.
I left my settings as pictured above, with the script tone set to Casual and the video duration at 1 minute. For my prompt, I asked the generator to write:
"A personal narration introducing myself (Jared) as the main character as I prepare for an upcoming road trip to the Grand Canyon."
The resulting script was good, but there weren’t obvious places for me to add my own commentary. To fix that, I supplied this revision request:
Add a few spaces where I can interject and add my own personal commentary
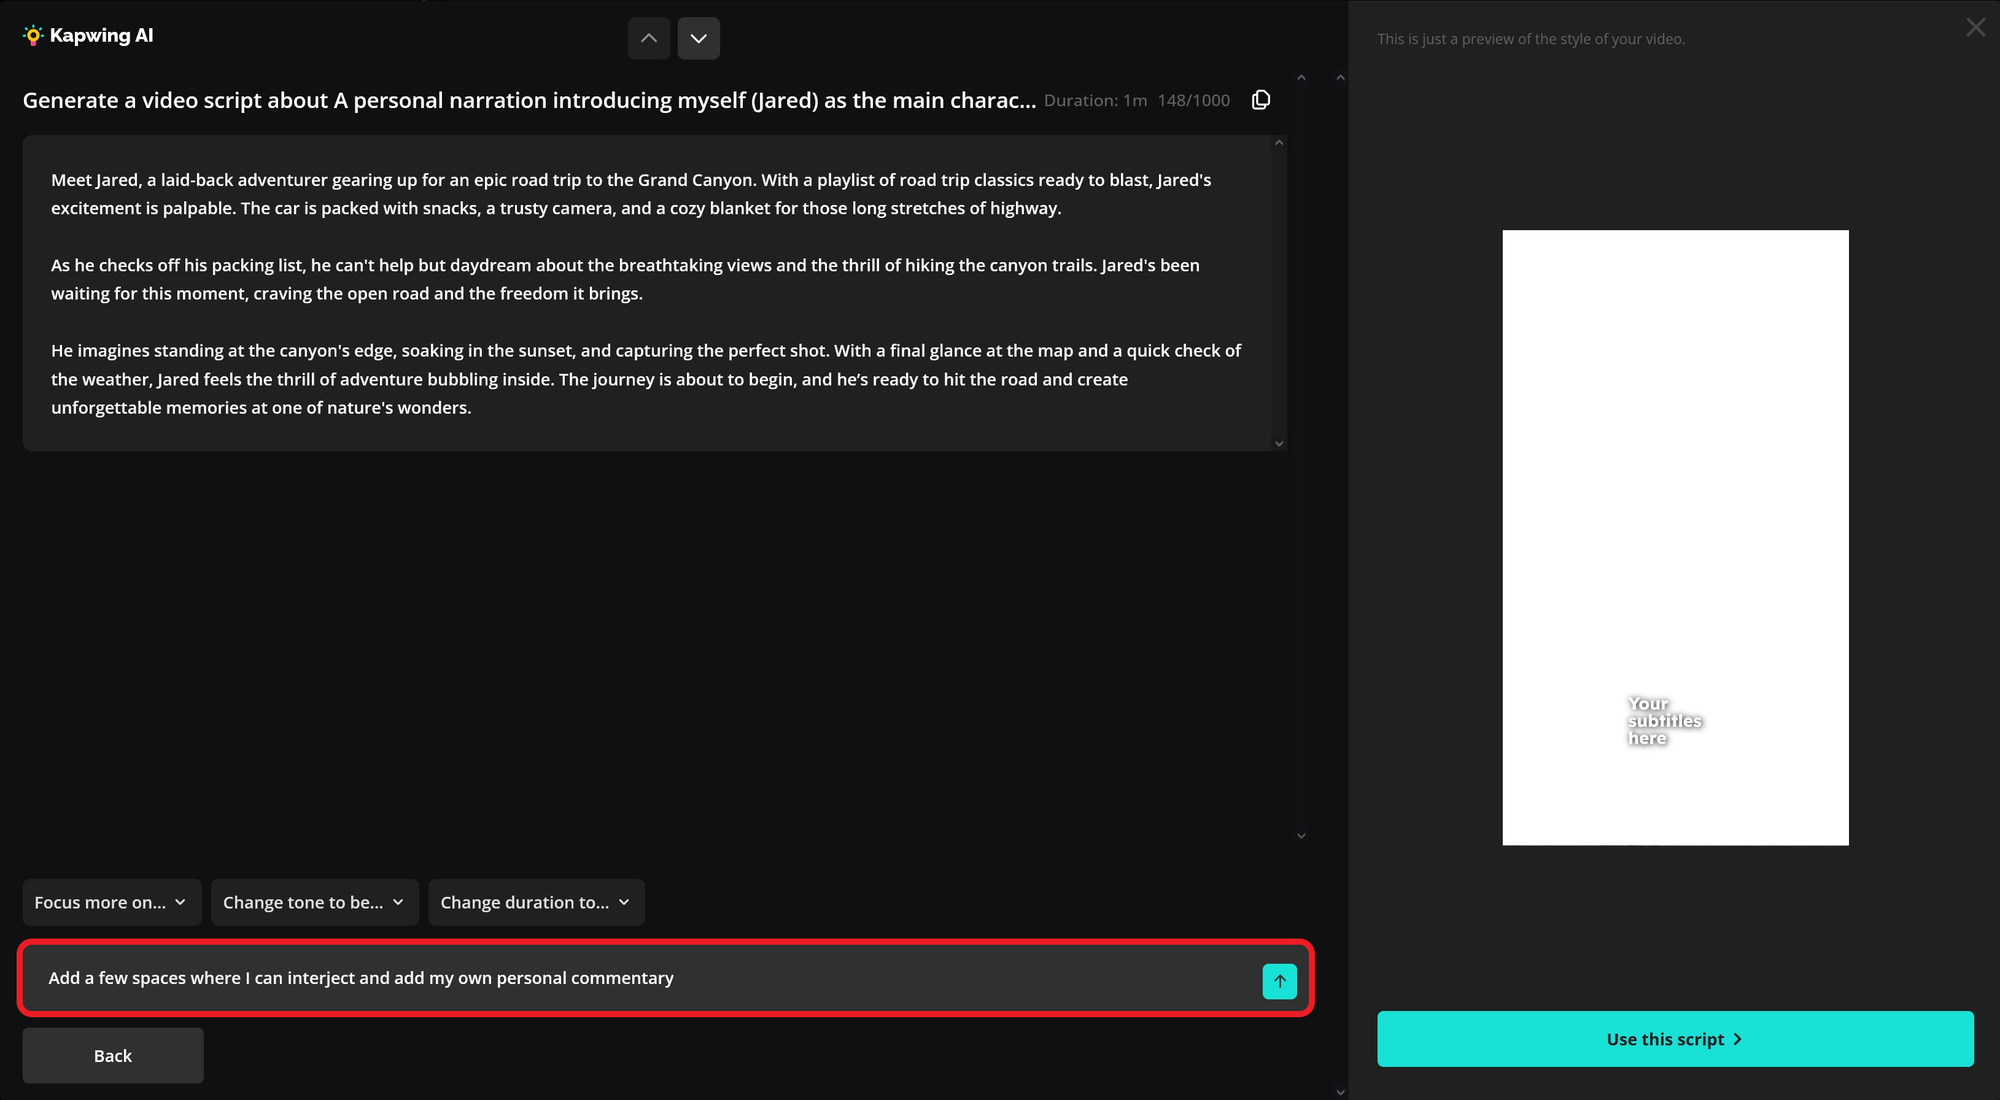
The revised script aligned with my final vision, so I made no further changes. Once you're ready to proceed with your script, select the Use this script button.
In the next screen, you’ll have the option to make final configurations to your project before the video is generated. Don’t worry if you change your mind later — these details can all be adjusted once your video opens in the editor.
Here is a closer look at these final editing tools:

- Aspect Ratio: Select the 9:16 aspect ratio to ensure your video is properly sized for TikTok.
- Subtitles Style: Choose a preset subtitle style to control how your captions appear. Colors, fonts, and sizes can be adjusted later.
- Media Types: Upload your own clips or automatically use matching stock footage to accompany your narration.
- Editing Style: Choose whether you want an AI speaker or just B-roll clips in your video.
- Narrator Voice: Choose the voice you'd like to narrate your video. Use the available filters to find the tone and style that best match your content.
Since selecting the right narrator is a big part of this trend, I took the time to listen to the available options and found my favorite: Bill, who sounds like a trustworthy, older male voice is perfect for narrating my video.
To move on to the next step, select the Generate Video button.
Add Your Voice Over
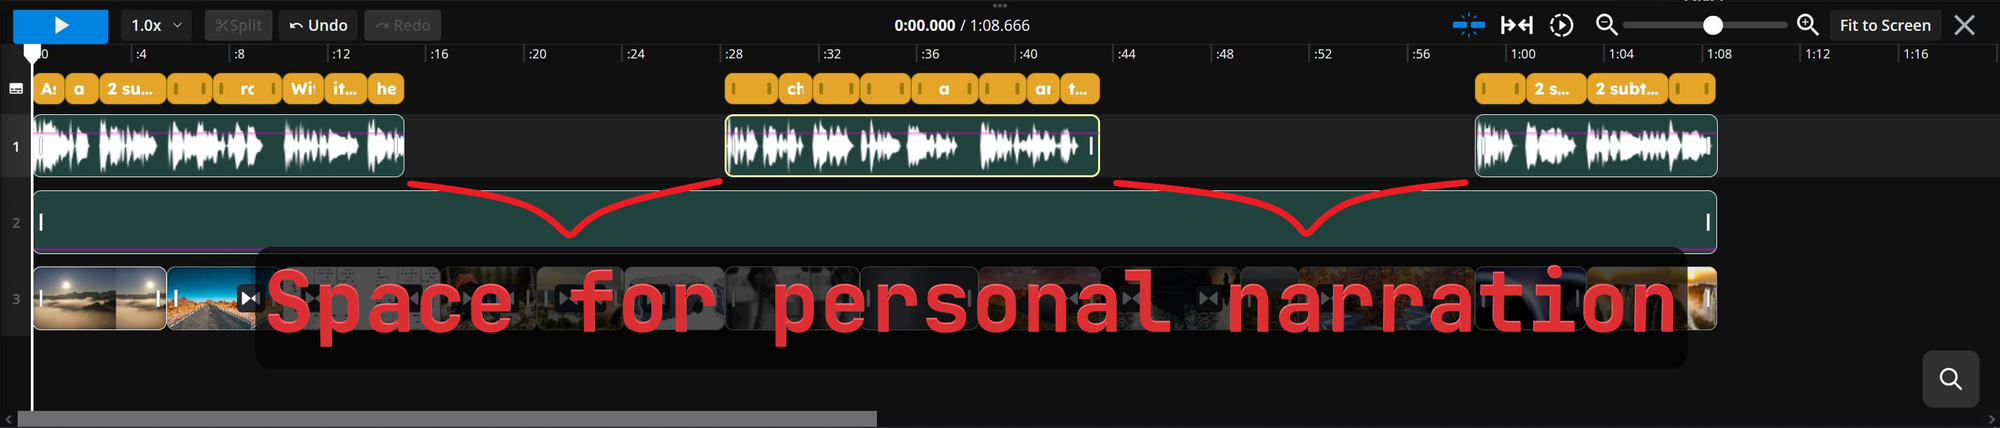
In this stage, your video project will feature stock clips, generated captions, and a voice over that stretches the entire duration of the video.

Since you will want room for your own commentary, the next step is to remove portions of the existing transcript to free up some space. To do this, open the Transcript menu in the left-hand sidebar and highlight the text you'd like to delete.

Once you've removed all the unnecessary narration, don't forget to adjust the audio in the timeline.
Deleting the text in the Transcript menu will automatically cut the audio, so all you need to do is click and drag it to the desired location in the project timeline.
Then, you have two options for adding a voice over to your video.
First, you can record your audio within the editor to instantly add it to the timeline. This option is best if you don't want to be a visual speaker in the video and just want to feature video clips with overlaid audio.

The second option is to record your narration externally, like in your phone’s camera, and then upload it to the project. This option is better for creating a video in which you'll be a prominent visible character, which is the more popular style within the TikTok Narrator Trend.

For this project, I am going to use the second option. This is also where you will upload any video clips, like b-roll or action shots, to use in your video project.
After uploading, drag and drop your video or audio clips into the timeline to add them to your video.

Make Final Edits
After arranging your voice over clips, along with any other b-roll you want to overlay over the AI narration voice, you're ready to apply the final polishing details to your video project.
One of the key traits of most videos in this trend is the intro. Specifically, they typically start with the narrator voice saying "Meet [name]." Since we want our video to align with the Narrator Trend as closely as possible, we will recreate that.
To do so, open the AI Voice menu in the left-hand toolbar. Here, you will see a varying number of text blocks. The number will match however many AI narration voice sections you have in your video timeline — three in my case.

To add the intro text, simply edit your first sentence accordingly. For mine, I used "Meet Jared..." to provide a pause before the rest of the narration begins. This more closely aligns with the style of the narration voice trend on TikTok.
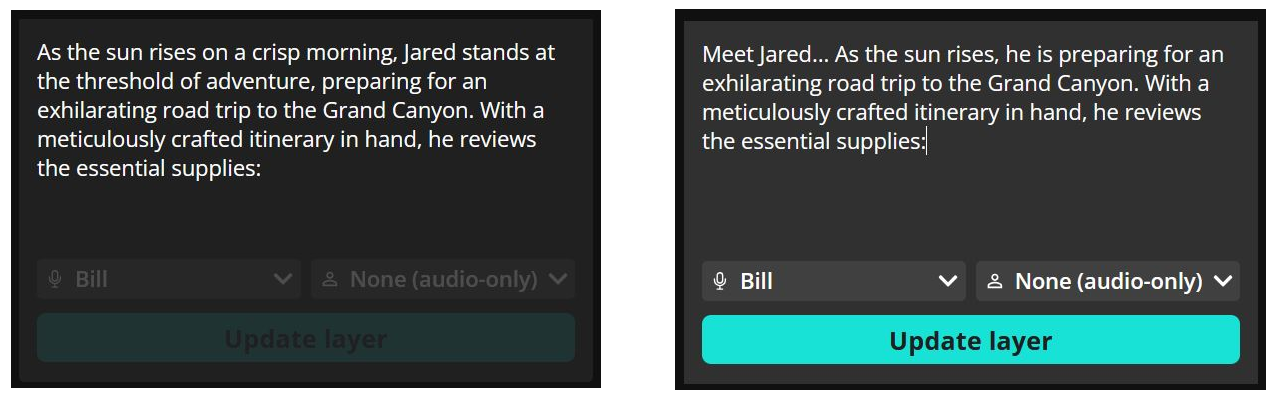
Beyond that, I ensured the rest of my text flowed smoothly in that block and saved the changes by selecting the Update layer button.
TikTok Narration Voice Trend Example
My final video consisted of a mix between stock footage that was automatically added by the editor and a collection of b-roll clips that I captured specifically for this project. You can choose to replace as few or as many of the auto-populated clips as you'd like. For a more personalized video, try to replace as many clips as possible with your own.
Here is my completed narration voice trend video as an example:
Video edited on Kapwing